


 CPU with DAKboard installed Setup | Bella Linda Installation Manual")
Connect HDMI to Display:
Start by connecting the HDMI cable to the Mini-HDMI ports on the CPU port circled below in 'red'.

Then, connect the other end of the cable to the HDMI port on your Display device. If you're using a TV, select the HDMI input labeled ARC/CEC if available.
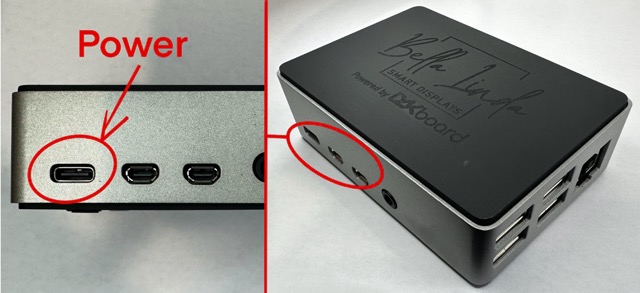
Connect Power:
Next, connect the power cable to the designated power port circled below in 'red'.
Automated Setup:
Once connected, your device will initiate the first-time setup process, which will be indicated on the screen. This may take 1-2 minutes to complete. Once the setup is finished, the following screen will be displayed, and you can proceed to configure the device.
Network Connection:
During the initial setup of your DAKboard OS device, or if it fails to connect to your network, it will create a local Hotspot to establish a temporary connection for making changes.
Note: If you prefer to set up via Ethernet instead, simply plug in the Ethernet cable and restart the device by unplugging and plugging it back in.
You will see a network named DAKboard available on your phone, tablet, or computer. Connect to this network using the provided Name/SSID and Password in your device's Wi-Fi settings.
Note: Your computer, tablet, or phone may indicate that this connection has no internet, which is normal. Make sure to remain connected to the DAKboard wifi until the configuration is completed.
Once connected to the DAKboard Hotspot, open a browser and enter http://10.0.0.5 to access the device's settings page for updating the wireless network configuration.
If your device is running OS version 3.41 (RPi) or later, you'll find the Touchscreen/On-Device Setup configuration button at the bottom of the welcome page.
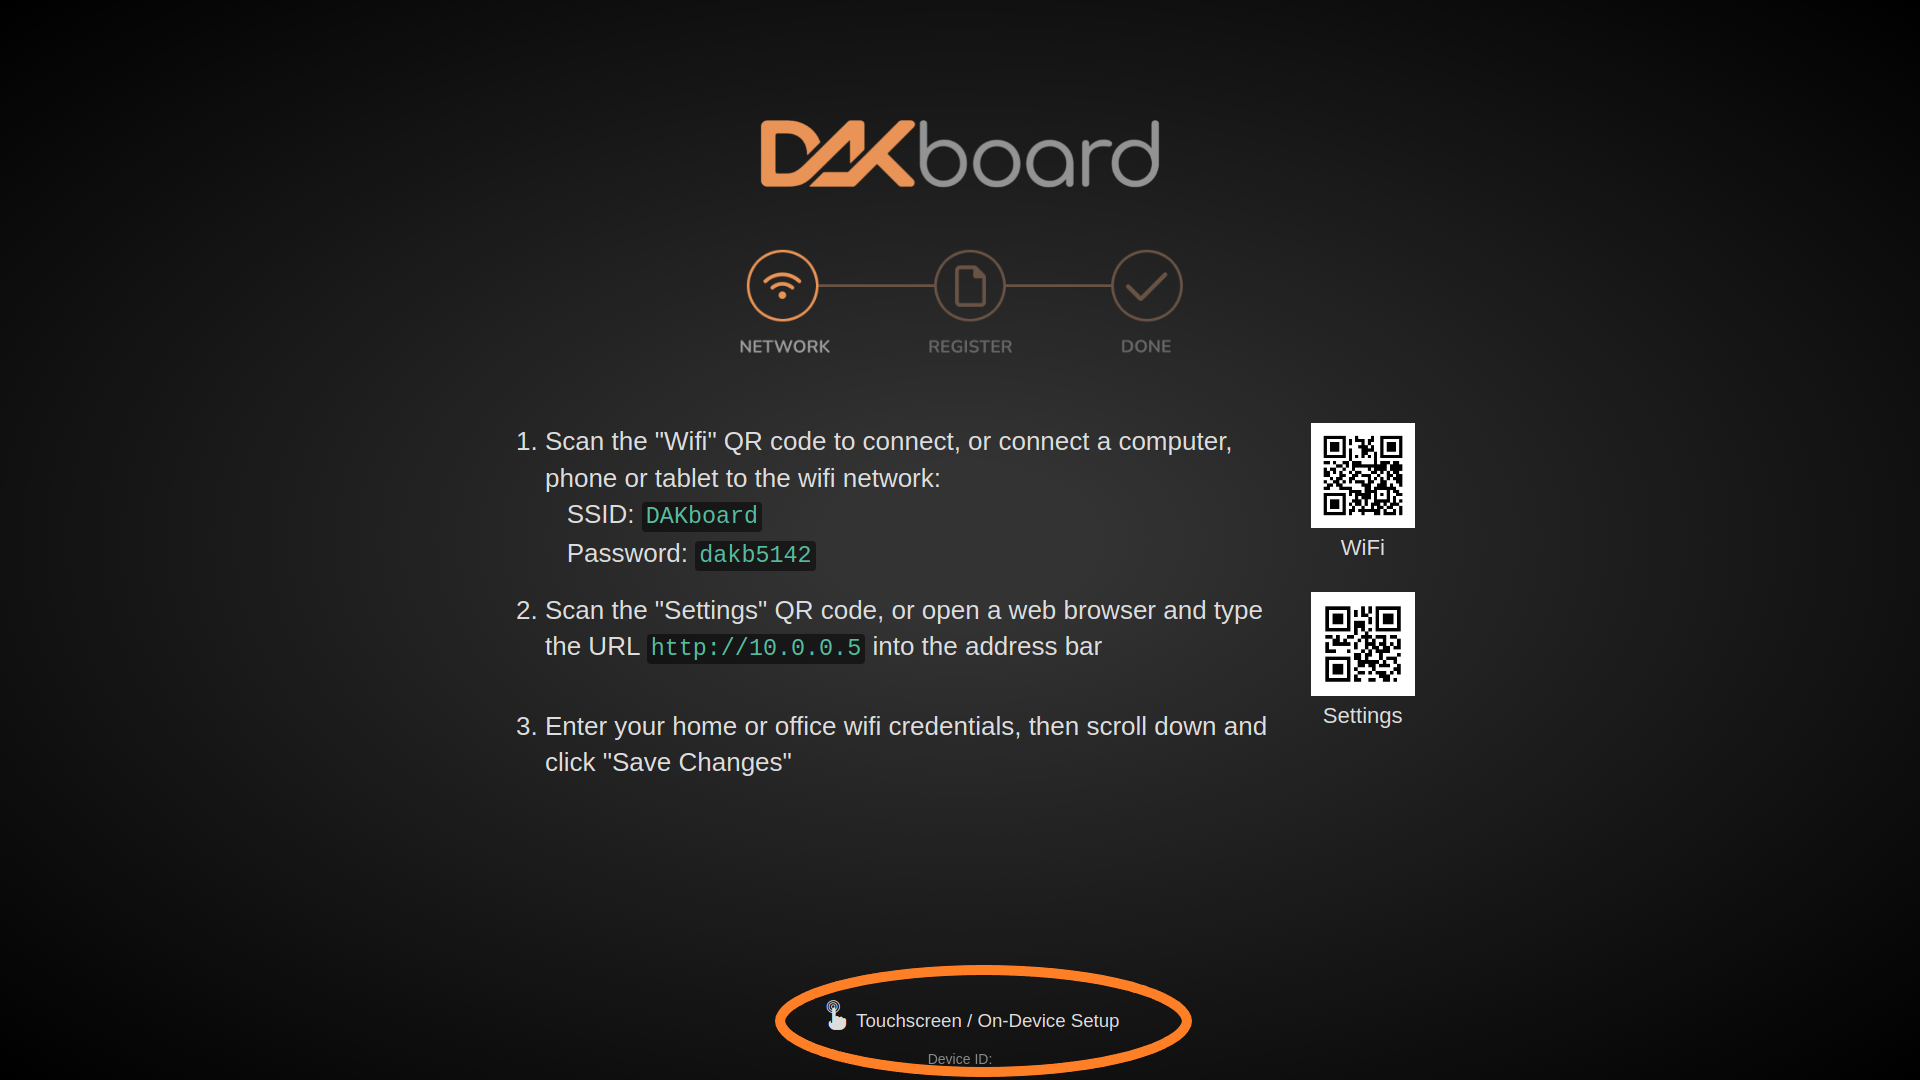
You can simply tap this button if you have a touchscreen monitor or click it with a connected USB mouse to access the settings page without logging into the DAKboard Hotspot.
Note: When entering your network Name/SSID and password, ensure that you don't add any hidden characters such as spaces. These hidden characters will prevent your device from connecting to your network. Double-check your credentials to ensure they are correct.
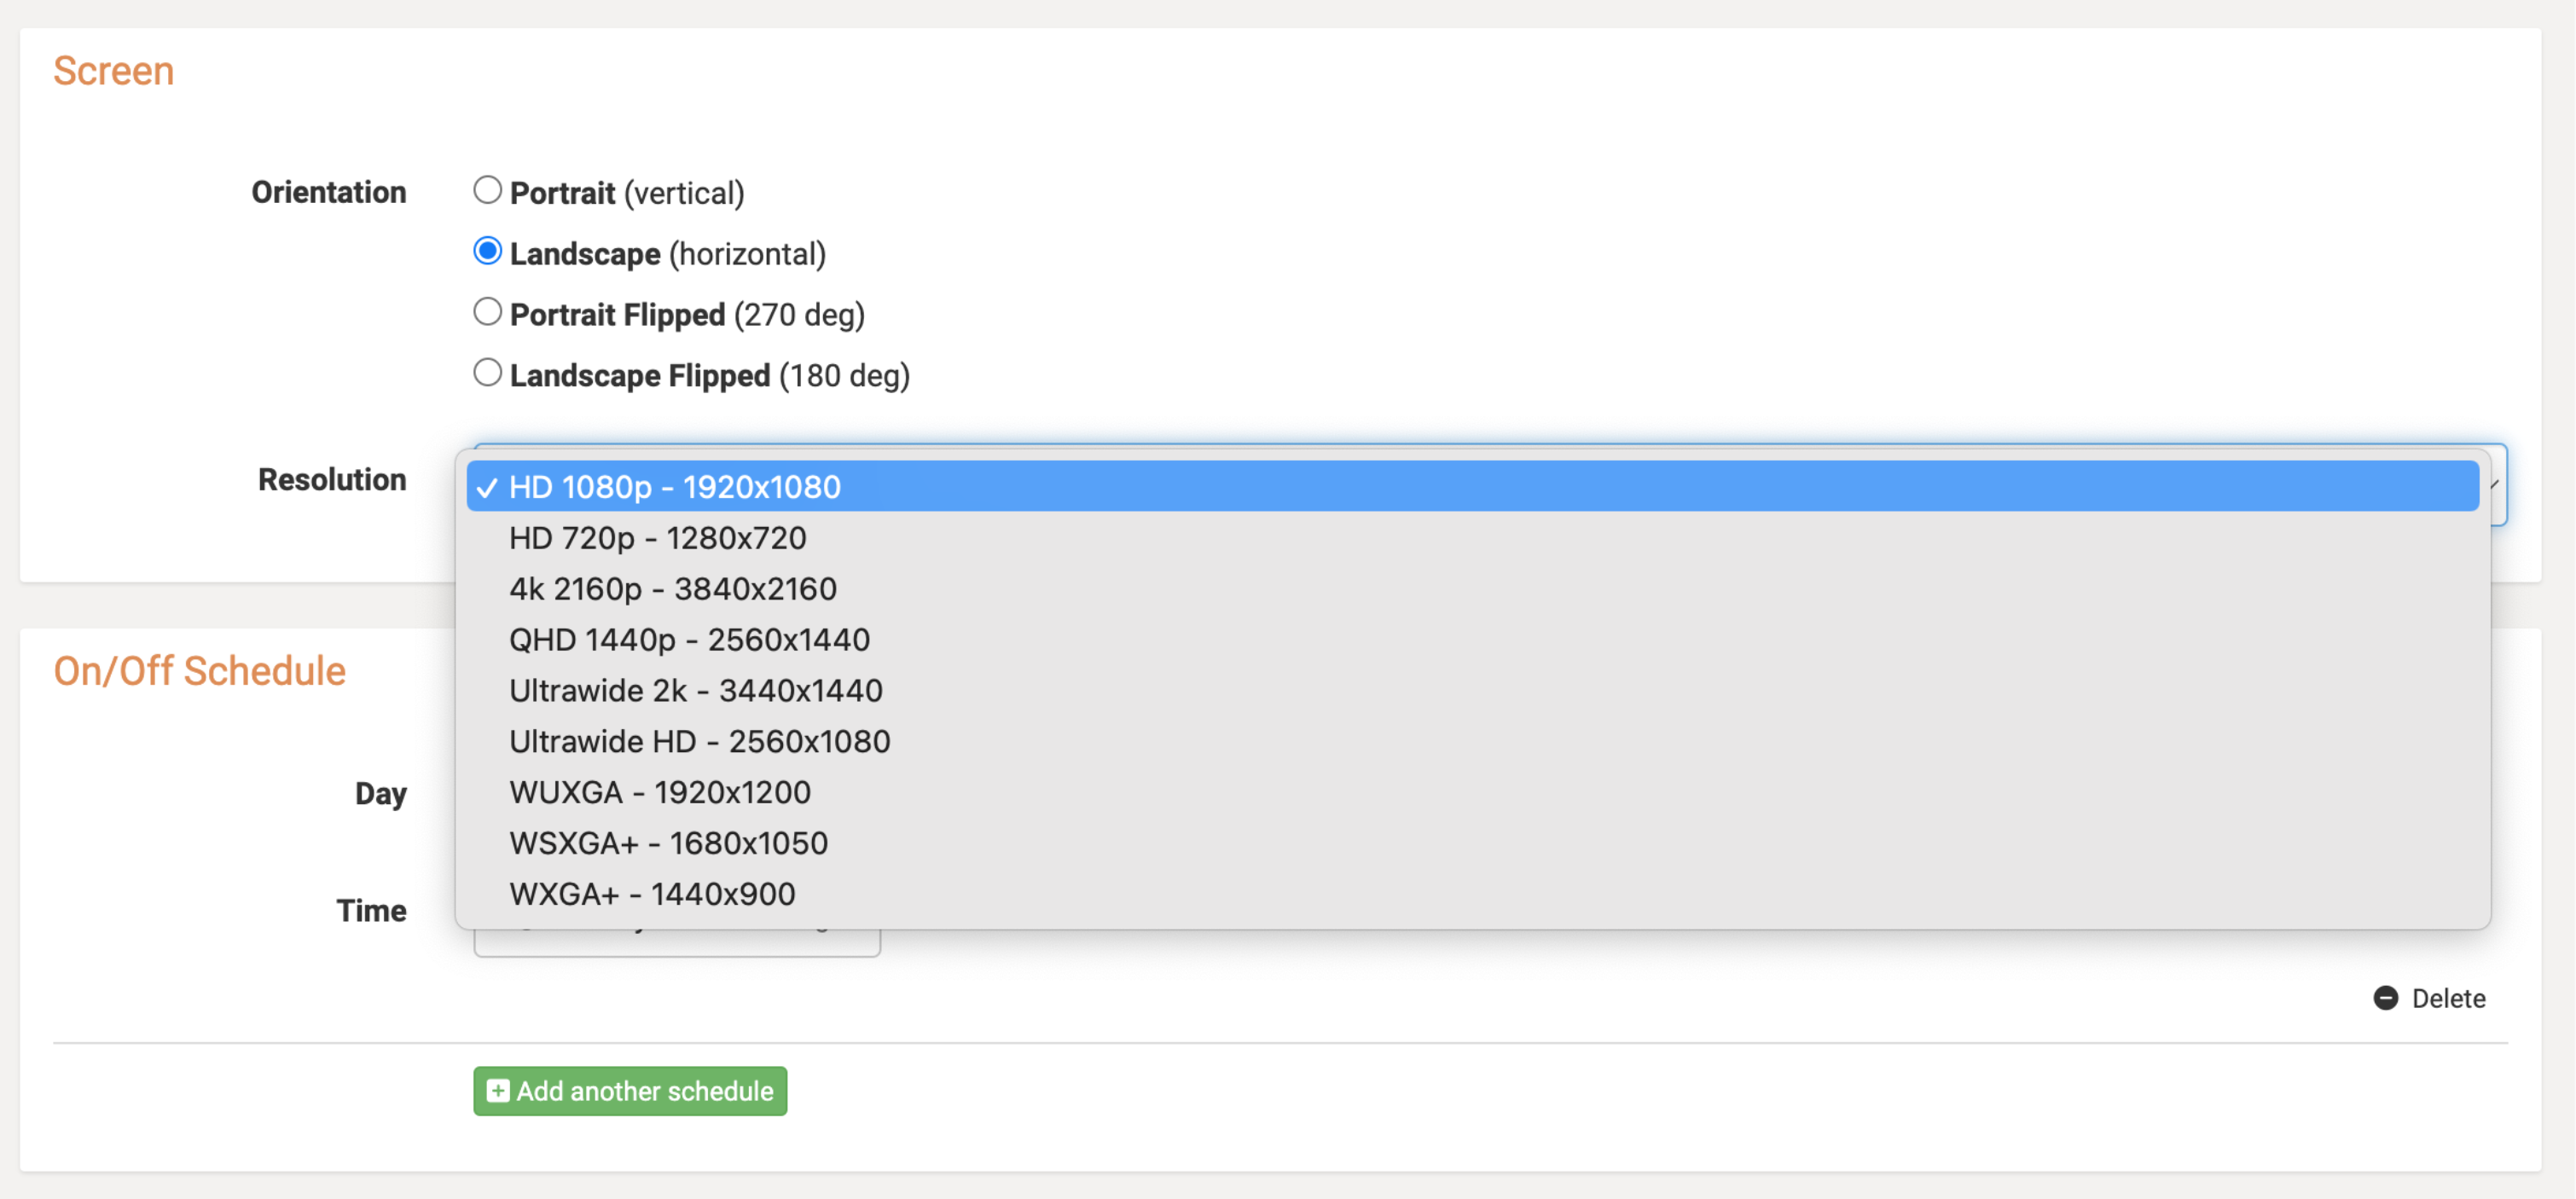
Take this opportunity to adjust your display settings and resolution according to your preferences.
Once you're satisfied, click the "Save" button.
Once the following page is displayed, it means your device is successfully connected to your network and ready to be linked to your dakboard.com account.
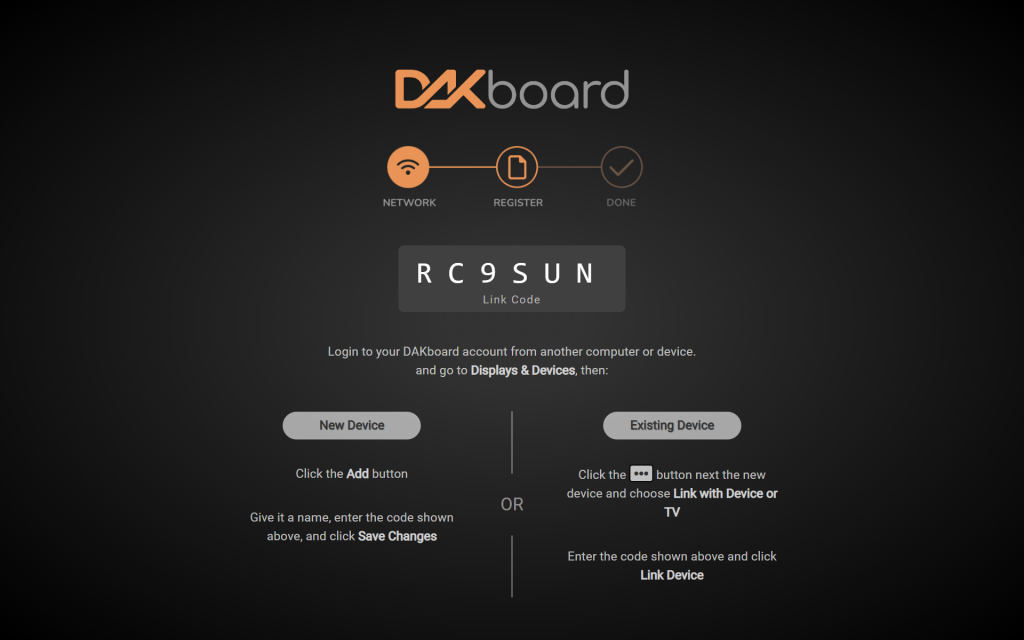
Linking Your Display:
To link your device, visit the Displays & Devices page in your DAKboard account, click the green "ADD" button, and enter your link code. Provide a name for your device, choose the desired content to display on the screen, and you're all set!
