


Good day,
I would like to personally thank you for supporting a small Australian business in your purchase of the Bella Linda – Digital Wall Display. We are doing our best to do good for the environment by using recycled pallet wood as much as possible. In fact, the frame of the Digital Wall Display is made using 100% recycled pallet wood and stained to the color of your choice.
I would like to take this opportunity now, if you have not already done a little research, to walk you through the installation and setup of your new Digital Wall Display.
Firstly, I have supplied you with the mounting bracket to hang the display onto the wall. It is a ‘French Cleat’ designed mounting style that ensures the Digital Wall Display sits flush against the wall. All that is required is for you to install the bracket and slide the Digital Wall Display onto the bracket in the desired orientation (Landscape or Portrait).
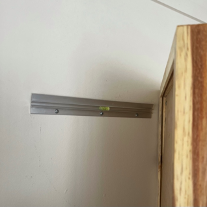
Back of Digital Wall Display, showing notch that bracket slots into.
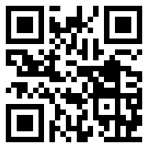
For more information on how to install the bracket to the wall, you may refer to the below YouTube video Linked QR CODE.

https://youtu.be/UHlgns7jxW4?t=42
How to hang a heavy mirror or picture with ITW Anchors
Secondly, you will need to plug the Digital Wall Display into a power supply (GPO). You will be presented with the below screen on load up for the first time, this is a once off setup.
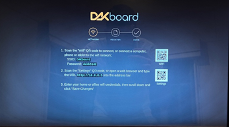
From here, you will be tasked with connecting to the Digital Wall Display WIFI by scanning the WiFI QR Code presented on the Screen. Followed by setting up the Digital Wall Display to your home/office WIFI networking. From this screen you can also change the orientation of the display between Landscape or Portrait.
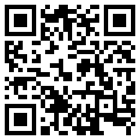
For the step-by-step walk through on the above setup, you may refer to the below YouTube video Linked QR CODE.
DAKboard OS Network Setup
Lastly, if you have not already done so, you will need to setup up an account with DAKboard at the following webpage, dakboard.com. Once set up and logged in, you can add your NEW Digital Wall Display to your account by heading over to ‘Displays & Devices’ and clicking the green [+ ADD] button.
https://youtu.be/7_cyt7LJ0QI?t=121
Legacy - DAKboard Setup & Registration
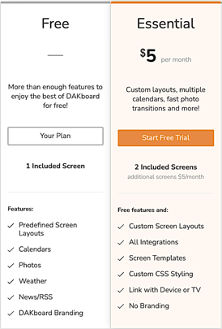
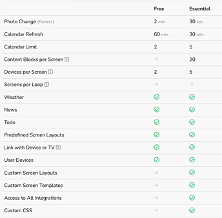
By default, you will have a free account which allows you 5 standard layouts where you will be able to customise your background, link one calendar account, set your date and time, include your local weather, enable news feed through RSS Feeds, connect a To Do List, add a custom message and change the font size under ‘Settings & Default’.
For more of a customisable experience, you can sign up to the DAKboard Essential subscription for
US$ 5/month or an Annual subscription of US$ 48/year, see below plans:
Additionally, here are some useful RSS Feed URLs, for news feeds:
Australia:
9News LINK
ABC News LINK
https://www.abc.net.au/news/feed/2942460/rss
Global:
CNN Top Stories
http://rss.cnn.com/rss/edition.rss
Sky News Top Stories
http://feeds.skynews.com/feeds/rss/world.xml
I personally thank you again, and if you have any problems, please feel free to reach out to me at
info@bellalinda.com.au or through my mobile on +61 (0) 493 626 115
You can also contact the DAKboard Team direct for any software related questions at
contact@dakboard.com or check out their support site at dakboard.com/support
I further invite you to leave your feedback on your NEW Digital Wall Display by posting a review to our google profile by searching Bella Linda Australia on Google or following and tagging us on Facebook or Instagram on your newly installed Digital Wall Display by searching and tagging @BellaLindaAustralia.
Kindest regards
Martin Vieira
Owner & Pallet Wood Worker
@BellaLindaAustralia